After playing around with Intel’s HD 4000 in our previous reviews and recording some pretty impressive performance, we decided to try to find the limit of the HD 4000’s graphics performance. To carry out this task we used Intel’s own over-clocking utility to tweak the HD 4000 and attain the highest level of performance it can offer. As you’ll soon see Intel has a great little over-clocking utility and the HD 4000 has a surprisingly large amount of headroom above its stock clock speed, but the gains from over-clocking the HD 4000 are a bit less than you might hope.
Intel’s Tweaking App
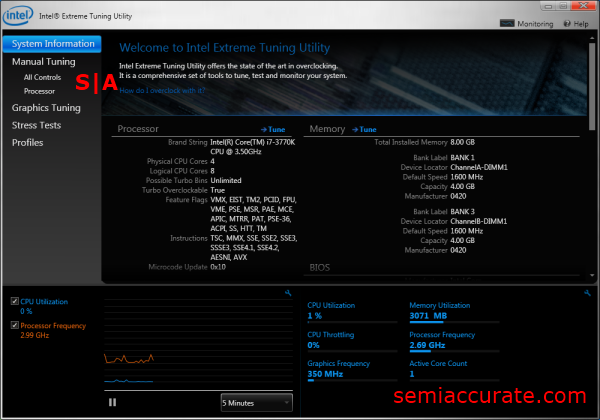
What we’re looking at below is a screenshot of Intel’s Extreme Tweaking Utility. As you can see it offers quite a bit of information about your CPU and PC configuration.
This system information page is pretty detailed actually. Intel’s got a CPU-Z like read out on some of the particulars of the CPU and the memory subsystem. Additionally, this utility sports a tabbed panel navigation system that allows you to quickly switch between all the major functions of this tuning application. As far as aesthetics go Intel’s Extreme tweaking utility is not bad-looking, although the varying shades of blue, black, and grey tend to blend together after a while.
By far the biggest advantage that using this utility provides over tweaking your system through the BIOS is the system monitor readouts that take up the lower third of the window. This system monitor can be configured to tell you clock speeds, CPU usage, temperatures, and most importantly the current TDP of the CPU and GPU parts of your chip. This information is extremely important for when you’re overclocking as it can tell you whether you need to bump up the TDP caps to get the most out of your overclock.
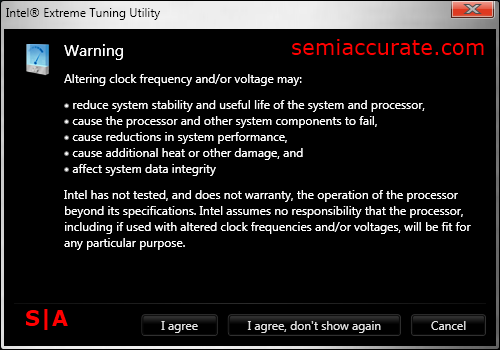
Here we have the EULA type warning that greets you click on the Manual Tuning tab. Like most other tuning apps, Intel’s is not going to be taking responsibility if you tweak one of the settings just a bit too far and end up with a dead chip.
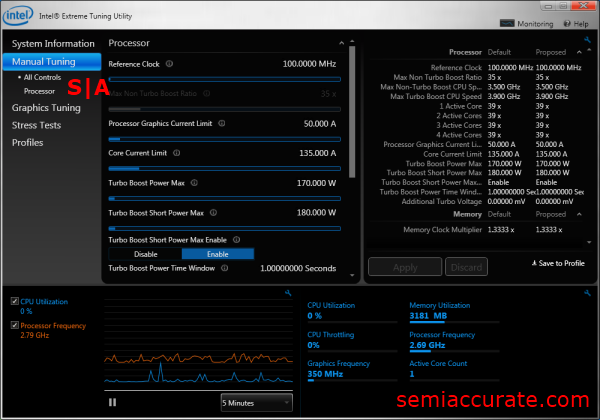
Looking at the controls on the Manual tuning page we see the all the different ways that Intel’s utility allows us to tweak our chip. Now most of the controls in the center of the window are about controlling the electric current and total power the CPU, GPU, and TurboBoost functions are allowed to use. Much like how modern high-end GPUs require users to change a PowerTune limit, Intel’s Ivy Bridge based chips require you to play with power consumption settings as well. Looking to the information panel on the right hand side of the window we can see all kinds of readouts like multipliers, turbo boost power caps, and clock speeds.
Taking it to the Limit
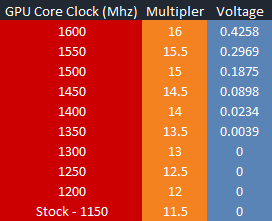
Now for the real tweaking. Below is a table of clock, multiplier and voltage settings that were stable and artifact free, while the HD 4000 was running Furmark’s burn-in stress test.
I found that after 1300 Mhz the HD 4000 required additional voltage to produce artifact free frames. While initially the voltage needed by these higher clocks was quite small, as we continued to increase the clock multiplier the HD 4000 needed exponentially more voltage to remain stable and produce artifact free images.
The maximum stable overclock I was able to achieve was 1600 Mhz. Increasing the clock speed to 1650 Mhz caused the HD 4000 to throttle after a few seconds no matter how much, or how much voltage we tried adding.
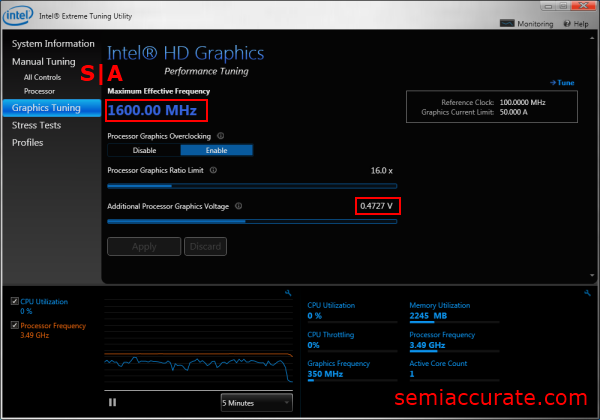
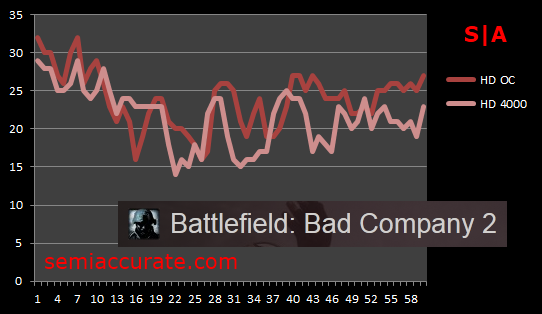
We tested out our overclock in Bad Company 2 with mixed results. Performance was somewhat better, but nowhere near the 39 percent increase clock speed that we were able to attain. More importantly we found that the game would crash after a few minutes. So I ratcheted up the voltage until the game seemed completely stable. This “Bad Company 2 Stable” voltage ended up being much higher than the voltage needed for Furmark’s stress test. 0.4727 additional volts is a lot to apply to any modern processor. As such I’m not sure that this overclock is 24/7 safe, but I haven’t encountered any issues with it so far.
As I mentioned earlier I achieved a 39 percent overclock, so upon seeing less than impressive performance improvements in Bad Company 2 I decided to investigate. I ended up using Intel’s graphics current limit setting to increase the TDP cap on the HD 4000 to somewhere between 45 and 52 Watts, from the 35 Watts it had been capped at before. I did this by simply maxing out the slider shown above.
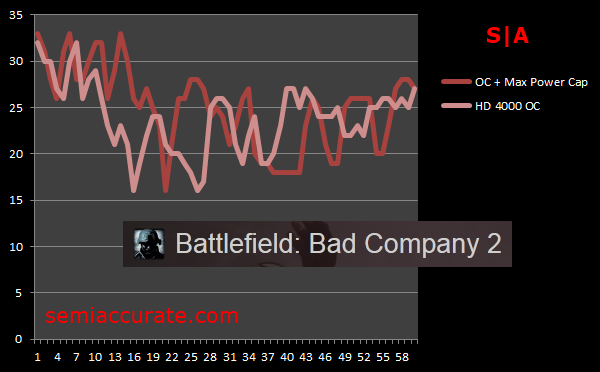
We re-benchmarked our overclock with the new TDP headroom setting and found another small, but significant increase in performance over the old overclock with the stock TDP configuration.
Was it Worth the Time?
Admittedly, these graphs don’t show off the performance improvements all that well, but looking at the average frame rates tells us a much clearer story.
We recorded a 10 percent improvement in frame rates from stock speeds with our TDP capped overclock. This isn’t much an improvement to write home about, and a rather disappointing return on our 450 Mhz overclock. Moving to our non-TDP capped overclock we can see that our frame rates improved about 16 percent over stock. Again, this isn’t all that impressive considering how much additional voltage and clock speed we used to get to these results. At the same time though, our overclocking attempt moved frame rates in Bad Company 2 from the low-twenties up into the mid-twenties which is a perceptible improvement. But it’s not enough of an improvement to enable us to increase any of the game’s graphical quality settings and support playable frame rates.
So really overclocking the HD 4000 is a mixed bag. If you’ve got the time it can’t hurt; but if you’re afraid of damaging your shiny new $300 chip, you shouldn’t feel like you’re missing out by not clocking it into the stratosphere.S|A
Thomas Ryan
Latest posts by Thomas Ryan (see all)
- Intel’s Core i7-8700K: A Review - Oct 5, 2017
- Raijintek’s Thetis Window: A Case Review - Sep 28, 2017
- Intel’s Core i9-7980XE: A Review - Sep 25, 2017
- AMD’s Ryzen Pro and Ryzen Threadripper 1900X Come to Market - Aug 31, 2017
- Intel’s Core i9-7900X: A Review - Aug 24, 2017
